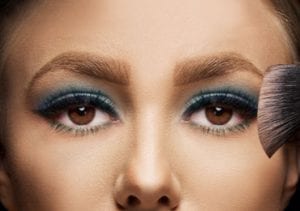
Imagine this – You’ve got a big day ahead—an interview, a date, or maybe just a coffee catch-up with a friend you haven’t seen in years. You stand in front of the mirror, and all you can focus on is that stubborn blemish on your chin or the dark circles that make it look like you’ve pulled three all-nighters in a row. That’s when you reach for your makeup bag and pull out the tiny hero in a tube—concealer.
But here’s the truth: concealer isn’t just “dab and done.” It’s an art, a science, and for many of us, a bit of trial and error. The shade you choose, the way you apply it, and even how you set it depends a lot on your skin tone and undertone. Think of concealer as a tailor—when it’s the right fit, it enhances everything beautifully. When it’s the wrong one, well, it’s like wearing shoes two sizes too big—everyone notices.
So, let’s walk through the world of concealer together, like friends exploring a new city. By the end, you’ll know how to choose, apply, and set concealer based on your skin tone without second-guessing yourself in front of the mirror.

Step 1: Meeting Your Skin Tone and Undertone
Let’s start with a metaphor: if your skin tone is the surface of the ocean, your undertone is the current underneath. You might be fair, medium, or deep on the surface, but the undertone decides whether that surface looks cool, warm, neutral, or olive.
- Warm undertones are like golden sunsets—they lean yellow, peachy, or golden.
- Cool undertones are like twilight skies—they have pink, red, or bluish hues.
- Neutral undertones sit in the middle, a balance of warm and cool.
- Olive undertones are unique; they carry a slightly greenish or earthy cast.
A quick trick? Stand by a window with a piece of jewelry. If gold flatters you, you’re warm. If silver makes you glow, you’re cool. If both look good, you’re neutral. If neither feels quite right and you often look better in earthy tones, you might be olive.
Knowing this is like finding the right compass—you won’t get lost when choosing a concealer.
Step 2: Choosing the Right Concealer Type
Here’s where many beginners slip: not all concealers are created equal. Picture walking into a café. You wouldn’t order the same coffee on a hot summer morning that you’d crave on a cozy winter evening, right? Concealers work the same way—different types suit different needs.
- Liquid concealers are the crowd-pleasers. They’re versatile, easy to blend, and perfect for beginners. They work under the eyes and across the face, especially if your skin is normal, oily, or combination.
- Cream concealers are like rich lattes—thicker and great when you need extra coverage for blemishes or scars.
- Color-correcting concealers are the unsung heroes—peach, orange, green, or lavender shades that neutralize discoloration before your “skin-tone” concealer goes on.
And don’t forget finish. Oily-skinned folks may prefer matte or natural-matte liquids, while those with dry or mature skin will love hydrating or radiant formulas. Sensitive under-eyes? Look for fragrance-free, ophthalmologist-tested options.
Step 3: The Shade Strategy
Think of concealer like lighting in a room. Sometimes you want a soft glow (brightening under the eyes), other times you want even coverage (masking blemishes).
- For under-eyes, go for a shade one shade lighter than your foundation. Any lighter and it can look ghostly or ashy.
- For blemishes and spots, match your exact foundation shade. Lighter shades highlight what you’re trying to hide.
- For highlighting, you can go one to one-and-a-half shades lighter—just enough to catch the light without overexposing.
Color-correcting shades follow a bit of a painter’s rulebook:
- Blue or purple under-eyes (fair to medium skin): use a soft peach or salmon corrector.
- Deep dark circles (tan to deep skin): try orange or terracotta.
- Redness (all tones): green corrector.
- Sallow skin (light to medium): lavender corrector.
Step 4: Application Ritual
Now comes the fun part—the actual brush-to-skin magic. Here’s a simple beginner-friendly ritual:
- Prep like a pro: Cleanse, moisturize, and apply SPF (if daytime). Think of this as priming a canvas before painting.
- Base first: Apply your foundation or tinted moisturizer. Often, this alone covers more than you think.
- Correct (if needed): A whisper of peach or orange corrector where discoloration shows. Keep it thin.
- Conceal:
- For under-eyes: Two small dots, one near the inner corner and one near the outer edge. Blend in a gentle V-shape.
- For blemishes: Use a pinpoint brush to dot concealer directly on the spot, then tap edges to blend.
- Blend: Use your fingertip for warmth, a damp sponge for seamless blending, or a tiny brush for precision.
- Set lightly: With a soft touch of powder. Press, don’t sweep.
Think of this as layering—thin, intentional strokes instead of thick patches.
Step 5: Tone-by-Tone Secrets
Let’s zoom in on different skin tones, because the rules do shift slightly.
1. Fair Skin
For fair skin tones, concealer application requires careful attention because blue and purple under-eye shadows tend to appear more prominent against lighter complexions. To neutralize this, experts recommend starting with a sheer peach or soft salmon corrector, which counteracts the cool undertones of dark circles without looking heavy.
Once corrected, apply a concealer that is one shade lighter than your foundation, preferably with a neutral or pink undertone to brighten without turning yellow or ashy. For blemishes, always choose a concealer that matches your foundation exactly. Finally, set the area with a translucent or fair-toned powder to maintain a natural finish.
2. Light to Medium Skin
For light to medium skin tones, concealer application focuses on balancing mild shadows under the eyes and neutralizing common redness around the nose or cheeks. A peach-toned concealer works best for brightening the under-eye area, as it counteracts bluish or purple undertones without appearing too heavy.
To address redness, especially around the nose or blemish-prone areas, opt for a concealer with a yellow undertone, which naturally cancels out redness and blends seamlessly with this skin range. When setting the concealer, use a light banana powder or a translucent setting powder, ensuring the complexion remains fresh, even-toned, and natural-looking throughout the day.
3. Olive or Tan Skin
For olive or tan skin tones, concealer application requires precision because under-eye darkness often appears gray and certain pink-based products can clash with the skin’s natural undertone. To correct discoloration, begin with a peach to orange corrector, depending on the depth of the darkness—peach for lighter tan tones and orange for deeper olive complexions. Follow this with a concealer that matches your foundation or is one shade lighter, ideally formulated with yellow-olive or neutral undertones to prevent ashiness. Avoid pink-based concealers, as they can look unnatural. Finally, set with a golden-beige or banana-toned powder to ensure seamless blending and a radiant, natural finish.
4. Brown Skin
For brown skin tones, concealer application should address common concerns like hyperpigmentation around the mouth, cheeks, and under-eyes, which can create unevenness. To neutralize this effectively, begin with an orange or terracotta corrector, as these shades counterbalance deeper blue or purple undertones without leaving a gray cast. Next, apply a concealer one shade lighter than your foundation under the eyes, preferably with a golden or neutral undertone to brighten naturally while avoiding ashy results. For blemishes or pigmentation spots, use an exact foundation-matching concealer for seamless coverage. Always set with a tinted or warm-toned powder to lock in color and prevent flashback.
5. Deep Skin
For deep skin tones, concealer application requires careful shade selection to avoid ashiness and maintain natural warmth. Dark circles often have strong blue or purple undertones, so start with a burnt orange or brick-colored corrector, applied in a thin layer to neutralize discoloration. Follow with a concealer half to one shade lighter than your foundation, choosing formulas with warm golden or neutral-red undertones to preserve skin richness and prevent grayness. For blemishes or hyperpigmentation, always match your concealer exactly to your foundation. To set, use a deep banana or tinted powder that complements your complexion, ensuring flawless coverage without flashback.
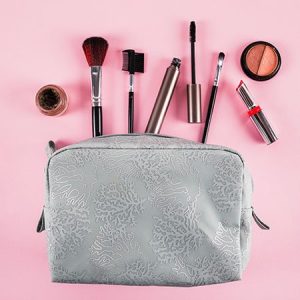
Step 6: Tools of the Trade
When it comes to applying concealer, the right tools can completely transform your results. Just as an artist carefully chooses their brushes to bring a painting to life, makeup enthusiasts rely on specific tools to blend, diffuse, and perfect concealer application. While fingers, sponges, and brushes may all seem interchangeable at first, each has unique strengths—and knowing when to use which tool makes the difference between a natural, skin-like finish and a patchy or heavy look.
1. Clean Fingertips – The Natural Blending Tool
Your fingertips are often the most underrated concealer tool. The natural warmth of your skin helps to gently melt creamy formulas, making them ideal for delicate areas such as the under-eyes. By tapping concealer with your ring finger (the weakest finger, applying the least pressure), you ensure product sinks into the skin without tugging. This method is especially useful for sheer coverage and quick touch-ups throughout the day.
2. Damp Sponge – The Blending Powerhouse
A damp makeup sponge, like a Beautyblender, is the go-to for achieving a flawless, airbrushed finish. Its porous texture allows it to diffuse concealer seamlessly, preventing harsh lines. The sponge’s versatility makes it perfect for pressing concealer under the eyes, softening edges around the nose, or even blending out heavier layers without looking cakey. A pro tip is to keep one side of the sponge damp for application, while leaving another side dry to absorb excess product if you accidentally apply too much.
3. Flat Concealer Brush – The Precision Tool
For pinpoint coverage, especially over blemishes or hyperpigmentation, nothing beats a flat concealer brush. Its firm, narrow shape allows you to place concealer exactly where it’s needed—without spreading it beyond the target area. This prevents product buildup around spots and ensures maximum coverage with minimal product. Professionals often layer concealer with a brush first, then blend the edges with a sponge or fingertip for a seamless transition.
4. Fluffy Eyeshadow Brush – The Setting Essential
Though not the first tool that comes to mind for concealer, a fluffy eyeshadow brush is excellent for setting makeup with powder. Its soft bristles dust a fine veil of translucent or tinted powder under the eyes or over concealed spots, locking in coverage without disturbing the product underneath. Unlike large powder brushes, its smaller size offers control, ensuring powder only goes where it’s needed.
Why Do Tools Matter?
Beginners often assume technique matters more than tools—but the reality is, the wrong tool can work against even the best technique. For example, blending under-eye concealer with a dense foundation brush may cause streaks or excess product buildup, while skipping powder entirely can cause concealer to crease. By investing in a few essential tools and learning their purposes, you simplify your makeup routine and achieve professional-looking results every time.
✨ Bottom line: Concealer isn’t just about the formula—it’s about the tools that help bring it to life. With clean fingertips for warmth, a damp sponge for smooth blending, a flat brush for precision, and a fluffy brush for setting, you’ll have every trick in the book to make your concealer look seamless and natural.
Step 7: Setting Without the Cake
Powder is like seasoning—you need just the right amount. Too much, and the dish is ruined.
Use a tiny amount of finely milled powder under the eyes.
Always press, never drag.
Choose tinted powders over stark white ones if you have medium to deep skin tones.
If your concealer creases during the day, tap it out with a clean fingertip before adding more powder. Adding more product on top of creases only exaggerates them.
meanwhile, here is a wonderful video explaining Color Correcting with a Deep Concealer –
Step 8: Avoiding Common Mistakes
Let’s talk about some common mistakes we make while applying a concealer on the face and how to avoid them.

Choosing a Shade That’s Too Light
One of the most frequent errors beginners make is applying a concealer that is two or more shades lighter than their foundation, especially under the eyes. While the intention is to brighten, this often results in a stark, unnatural highlight or even an ashy cast. Instead, opt for a concealer that is just one shade lighter, which brightens subtly and blends seamlessly.
Using the Same Shade Everywhere
Another mistake is using the same “brightening” concealer for all purposes. What works under the eyes won’t work for blemishes. Applying a lighter shade on pimples or hyperpigmentation only draws attention to them. For blemishes, always use a concealer that matches your exact skin tone to ensure spot coverage disappears into the rest of your complexion.
Over-Applying Product
Concealer is most effective when used sparingly. Layering too much product, especially under the eyes, leads to creasing, heaviness, and a cakey finish. A thin, targeted layer is always better, and additional coverage should be built gradually only where necessary.
Blending Incorrectly
Dragging or swiping concealer across the skin removes coverage and disrupts product placement. Instead, makeup artists recommend using a tapping or stippling motion with your fingertip, sponge, or brush. This keeps the concealer concentrated where you need it while diffusing the edges naturally.
Ignoring Undertones
Finally, neglecting undertone matching is a critical mistake. A concealer with the wrong undertone—such as pink on olive skin or too-yellow on cool skin—often looks gray or mismatched. Always consider whether your skin has warm, cool, neutral, or olive undertones when selecting both concealer and corrector shades.
The Simple Fix
The solution lies in a few universal rules: use less product, choose shades that match their purpose, and always consider undertones. With these adjustments, concealer enhances rather than distracts, leaving skin looking natural, bright, and flawless.
Step 9: Quick Routines You’ll Love
Concealer routines don’t have to be complicated. Depending on your time, occasion, and skin needs, you can follow one of these simple yet effective approaches:
1. Everyday Bright-Eyed Look (5 Minutes)
This routine is perfect for mornings when you’re short on time but want to look fresh and awake.
Steps:
- Prep the skin: Start with a lightweight moisturizer to hydrate and smooth the under-eye area. This prevents concealer from clinging to dry patches.
- Apply base: Use a light foundation or tinted moisturizer to even out your skin tone. This reduces the amount of concealer you’ll need.
- Correct darkness: If you notice under-eye shadows, dab a small amount of peach or salmon corrector (depending on your skin tone) just where the darkness is most visible.
- Conceal: Apply a concealer that’s one shade lighter than your foundation under the eyes. Place small dots in the inner and outer corners and gently blend in a triangle shape for a lifted effect.
- Set lightly: Finish with a tiny dusting of translucent or light banana powder under the eyes to keep the area crease-free and bright all day.
2. No-Makeup Spot Fix
For days you don’t want a full face of makeup but still want to hide blemishes or uneven patches.
Steps:
- Moisturize: Apply a light moisturizer all over your face to ensure smooth application.
- Spot correct: If the blemish is dark or has redness, use a thin layer of corrector (orange for dark marks, green for redness).
- Conceal: Take a small brush or fingertip and apply an exact foundation-matching concealer directly on the blemish. Avoid going lighter here—it will only highlight the spot.
- Blend edges: Feather out the edges of the concealer so it melts into your natural skin without leaving obvious patches.
- Set the spot: Gently press a bit of tinted powder on the concealed area to lock it in for hours without caking.
3. Full Glam Brightening
Best for nights out, special events, or when you want a flawless, camera-ready finish.
Steps:
- Create your base: Apply a medium-to-full coverage foundation to even your skin tone. Blend it well for a smooth canvas.
- Correct strategically: Apply color corrector where needed—peach/orange for under-eyes, green for redness, and lavender for dullness. Keep layers thin to avoid heaviness.
- Highlight with concealer: Use a concealer one shade lighter than your foundation on the high points of the face—under the eyes, bridge of the nose, center of the forehead, and chin. This creates dimension and brightness.
- Blend outward: Use a damp sponge to blend the concealer seamlessly into your foundation, keeping the brightness focused in the center of the face.
- Set with tinted powder: Lock everything in with a banana or tinted powder that matches your skin tone. This prevents flashback in photos and ensures long-lasting wear.
✨ Pro Tip: You don’t need dozens of products to master these routines. With two well-chosen concealers (a brightening shade and an exact-match shade), a corrector, and one good setting powder, you can create all three looks with ease.
Step 10: The Cheat Sheet
When applying concealer, it’s important to remember a few universal rules. For the under-eye area, always choose a concealer that is about one shade lighter than your foundation and matches your undertone to brighten naturally without looking stark.
For blemishes or spots, use a concealer that is the exact same shade as your foundation with the correct undertone, ensuring seamless coverage that blends into the skin. If you have fair to light skin, a peach or salmon corrector works best for dark circles, followed by a neutral or pink-toned brightening concealer.
For medium, tan, or olive complexions, a peach-to-orange corrector neutralizes darkness effectively, and concealers with yellow or olive undertones prevent ashiness.
Finally, for brown to deep skin tones, orange or terracotta correctors are most effective, paired with warm or neutral concealers under the eyes, and always set with a tinted or warm-toned powder to avoid flashback and maintain a natural finish.
Final Thoughts
Concealer isn’t just makeup—it’s confidence in a tube. The right shade brightens tired eyes, softens imperfections, and pulls your whole look together. But the secret isn’t hiding—it’s enhancing. When you choose concealer that works with your skin tone, not against it, you don’t look “covered up.” You look like yourself, only more refreshed.
So, the next time you’re standing at the mirror, don’t just reach for the lightest shade you can find. Take a minute to think: What does my skin tone need? What undertone am I working with? Where do I want brightness, and where do I want coverage? That little thought makes the difference between makeup that looks obvious and makeup that looks like second skin.
And here’s the best part—you don’t need a drawer full of products. Just two well-matched concealers (one for brightening, one for blemishes), a good sponge, and a tiny pot of powder can make you feel like you’ve cracked the secret code of makeup.
Because at the end of the day, concealer isn’t about perfection—it’s about letting your natural beauty shine through with just a little extra help.
Related Posts